LED strip dimmer - Software v. 1.2
Zápisník experimentátora
Hierarchy: Stmievač LED pásika pomocou ATtiny85
In this article I will explain the principle of LED strip dimming. This is the third of a series of articles that show you how the program progresses and how the resulting program may be diametrically different. We will gradually pass the source code of the program from version 1.0 to version 1.3.
This text describes the outdated version of the code. At the time of writing the article was the current version of code 1.3. This version is analyzed here so you can see how the program progresses with a progressive approach.
In the ideal world you will write the ideal program right away for the first time and will not make any mistakes and will do exactly what you imagined. And now welcome to the real world where I tried to program the dimming logic to suit the work in the kitchen.
Arduino IDE
The code was developed for version 1.0.6, but can be easily compiled in 1.6.13 or 1.8.2. After compilation of 2894 (6110 with debugging enabled), it occupies bytes. You need to have ATtiny85 programming support installed.
Programming
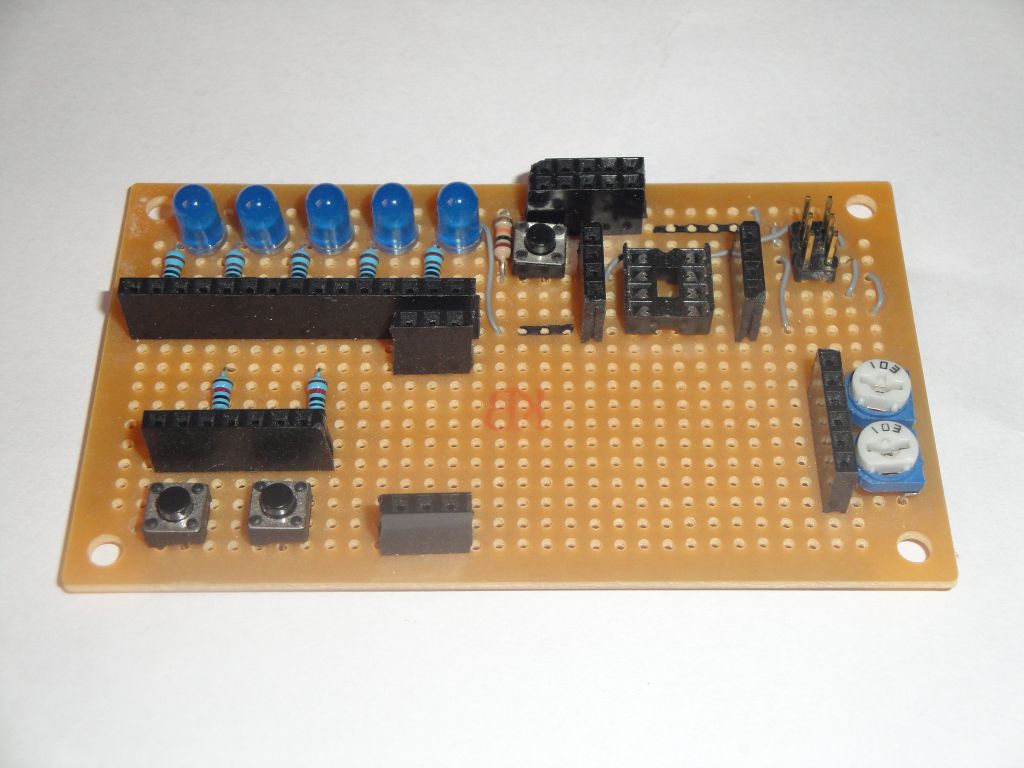
In this program, I focused on changing the program to a state machine. The whole development was on the development board for ATtiny85, which I already described in the previous article.
- Debugging with SoftwareSerial - ATtiny85 does not have a normal serial port but it can be replaced with this library. You pay for it a high tax of large memory consumption, which you have only 8 kB.
- States - Because lighting should behave differently under different boundary conditions, it is logical to use states and program specific behavior for each state.
- Linear dimming - Linear dimming is better suited to the human eye. See the separate article for details.
- Two Steps During Darkness - Practical experience of use has shown that it is appropriate to divide it into two sections. The first dimming dims the brightness to 30 percent, followed by a longer pause during which the person in the room has time to respond. Or it goes away and the light goes out completely, or it starts moving in the room and the light is set to the maximum intensity.
Debugging with SoftwareSerial
Debugging is based on the existence or absence of the RDEBUG macro. If it does not exist (the final version of the code), then pins 3 and 4 to which the SoftwareSerial library is set are not used at all, which means that the compiler will simply remove the code from the source.
If a macro is defined (debug version of code), debug statements are sent to the serial port. It is still worth mentioning that during the debug I have a hold_value shortened interval for 5 seconds. This is for practical reasons, because during development there is no reason to wait dozens of seconds to turn off the light.
//#define RDEBUG

#if defined RDEBUG
  #include <SoftwareSerial.h>

  const int dig_tx = 3;
  const int dig_rx = 4;
  SoftwareSerial s85(dig_rx, dig_tx); // RX, TX
#endif

#if defined RDEBUG
  const unsigned long hold_value = 5*1000L;
#else
  // base hold period
  const unsigned long hold_value = 45*1000L;
#endif

void setup() {
  pinMode(led, OUTPUT);
  pinMode(dig, INPUT);
#if defined RDEBUG
  s85.begin(9600);
  s85.println(F("ATtiny85 LED dimmer"));
#else
  for(int i=0;i<2;i++)
    ShowLedIsLive();
#endif
state=stDark;
}
States
I have the following states in the program:
- stBoot - The default status during booting. It is immediately replaced by stDark in setup.
- stDark - Describes the state of the light that is turned off.
- stOn - A state during which the illumination is fully turned on.
- stHold - Full illumination value when we have signal from the sensor.
- stOff - The condition that the illumination drops to 30 percent. If the signal from sensor is detected, it will jump to the state stOn.
- stOff30 - The condition during which illumination decreases to zero. If the signal from sensor is detected, it will jump to the state stOn.
- stHold30 - The state of lighting maintenance on 30 percent. If the signal from sensor is detected, it will jump to the state.
enum states {stBoot, stDark, stOn, stHold, stOff, stOff30, stHold30};
states state=stBoot;
And individual states have their functions in the code that control lighting behavior.
void loop() {
  switch(state) {
    case stDark:
      LightDark();
      break;
    case stOn:
      LightOn();
      break;
    case stHold:
      LightHold();
      break;
    case stOff:
      LightOff();
      break;
    case stHold30:
      LightHold30();
      break;
    case stOff30:
      LightOff30();
      break;
  }
}
Linear dimming
Linear dimming is made using a table of pre-calculated values.
const byte table[] PROGMEM = {
  0,   0,   0,   0,   0,   0,   0,   0,   0,   0,   0,   0,   0,   0,   0,   0,
  0,   0,   0,   1,   1,   1,   1,   1,   1,   1,   1,   1,   1,   1,   1,   1,
  1,   1,   1,   1,   1,   1,   1,   1,   1,   1,   1,   2,   2,   2,   2,   2,
  2,   2,   2,   2,   2,   2,   2,   2,   2,   2,   3,   3,   3,   3,   3,   3,
  3,   3,   3,   3,   3,   3,   4,   4,   4,   4,   4,   4,   4,   4,   4,   5,
  5,   5,   5,   5,   5,   5,   5,   6,   6,   6,   6,   6,   6,   6,   7,   7,
  7,   7,   7,   8,   8,   8,   8,   8,   9,   9,   9,   9,   9,  10,  10,  10,
 10,  11,  11,  11,  11,  12,  12,  12,  12,  13,  13,  13,  14,  14,  14,  15,
 15,  15,  16,  16,  16,  17,  17,  18,  18,  18,  19,  19,  20,  20,  21,  21,
 22,  22,  23,  23,  24,  24,  25,  25,  26,  26,  27,  28,  28,  29,  30,  30,
 31,  32,  32,  33,  34,  35,  35,  36,  37,  38,  39,  40,  40,  41,  42,  43,
 44,  45,  46,  47,  48,  49,  51,  52,  53,  54,  55,  56,  58,  59,  60,  62,
 63,  64,  66,  67,  69,  70,  72,  73,  75,  77,  78,  80,  82,  84,  86,  88,
 90,  91,  94,  96,  98, 100, 102, 104, 107, 109, 111, 114, 116, 119, 122, 124,
127, 130, 133, 136, 139, 142, 145, 148, 151, 155, 158, 161, 165, 169, 172, 176,
180, 184, 188, 192, 196, 201, 205, 210, 214, 219, 224, 229, 234, 239, 244, 250
};
For example, during dimming, the code looks like this. Now that I describe it again, I realize that this feature has bugs and that part of the code is never done. Because when the value drops below the value of 20, it will jump out of the function and the code at its end will never be executed.
void LightOff() {
#if defined RDEBUG
  s85.println(F("Light OFF"));
#endif
unsigned long ms=millis();
unsigned long m=0;
unsigned long m2=pot_value*6; // 6x on period
while(m<m2)
  {
  int p=digitalRead(dig);
  if(p)
    {
    state=stOn;
    #if defined RDEBUG
      s85.print(F("Signal break at "));
      //s85.println(value);
    #endif
    return;
    }
  value=map(m,0,m2,255,0);
  int vm=pgm_read_byte(&table[value]);
  value=vm;
  analogWrite(led,vm);
  if(value<20) {
    state=stHold30;
    return;
    }
  m=millis()-ms;
  }
digitalWrite(led, LOW);
value=0;
#if defined RDEBUG
  s85.println(F("Dark"));
#endif
state=stDark;
}
wo steps of dimming
This is a very important modification. The darkening is only a few seconds, and if the dimming has begun because you stopped moving around in the room (for example, you were starting to read the magazine), you would not have enough time to swing your hands to turn the light back on at full intensity. Therefore, the dimming is divided into two intervals. Between them there is a maintenance interval in the shade that gives you enough time to react.
///
/// Handled dusk
///
void LightHold30() {
#if defined RDEBUG
  s85.println(F("Light HOLD 30"));
#endif
dig_last=millis()+hold_value;
while(millis()<dig_last)
  {
  int p=digitalRead(dig);
  if(p) // still ON
    {
    #if defined RDEBUG
      //s85.print(F("dig_last="));
      //s85.println(dig_last);
    #endif
    state=stOn;
    return;
    }
  }
state=stOff30;
}

///
/// From dusk to darkness
///
void LightOff30() {
#if defined RDEBUG
  s85.println(F("OFF 30"));
#endif
unsigned long ms=millis();
unsigned long m=0;
unsigned long m2=pot_value;
while(m<m2)
  {
  int p=digitalRead(dig);
  if(p)
    {
    state=stOn;
    return;
    }
  int v=map(m,0,m2,value,0);
  analogWrite(led,v);
  value=v;
  m=millis()-ms;
  }
digitalWrite(led, LOW);
value=0;
state=stDark;
}
Source code
The source code is located on GitHub.
30.07.2017