ATtiny85 and TM1637 display
Zápisník experimentátora
Hierarchy: ATtiny85
For several months I am writing series for beginners on ATtiny85 microcontroller. You can use this microcontroller as a miniature Arduino replacement. But miniaturization also brings problems. The microcontroller has few pins, and it is not always possible to use a serial port on it. That's why I chose this small 7-segment display to show the simple information in the next sequel. You can easily buy the display in Chinese e-shops. To familiarize yourself with the display, it is advisable to read the article Arduino and the TM1637 display.
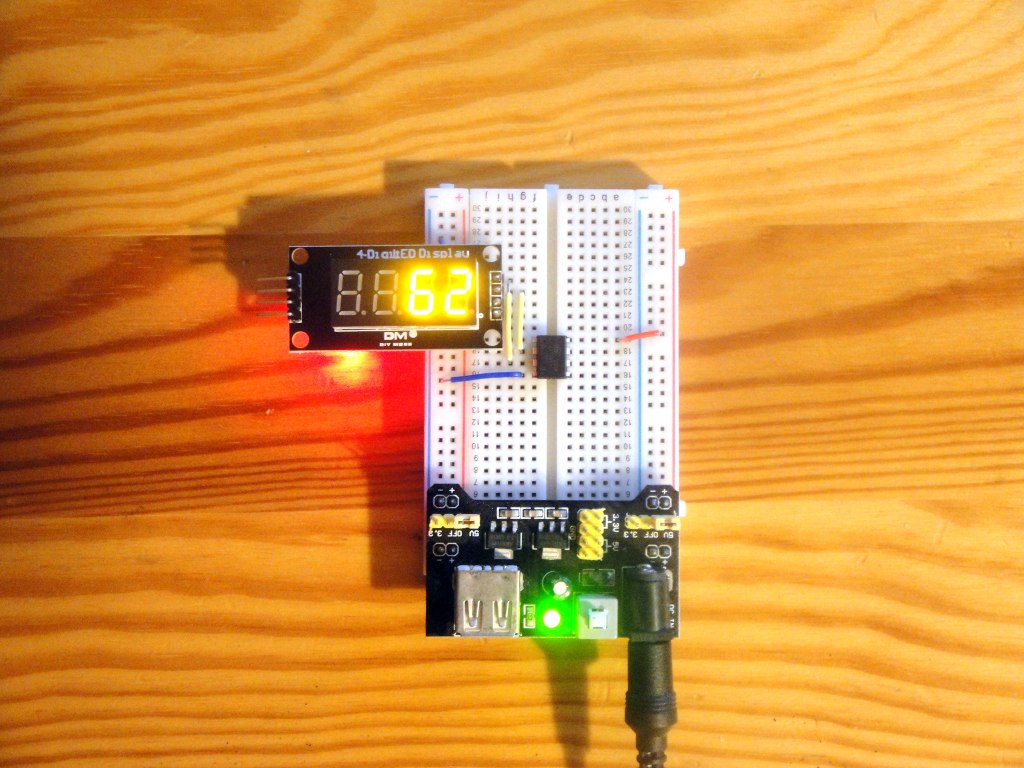
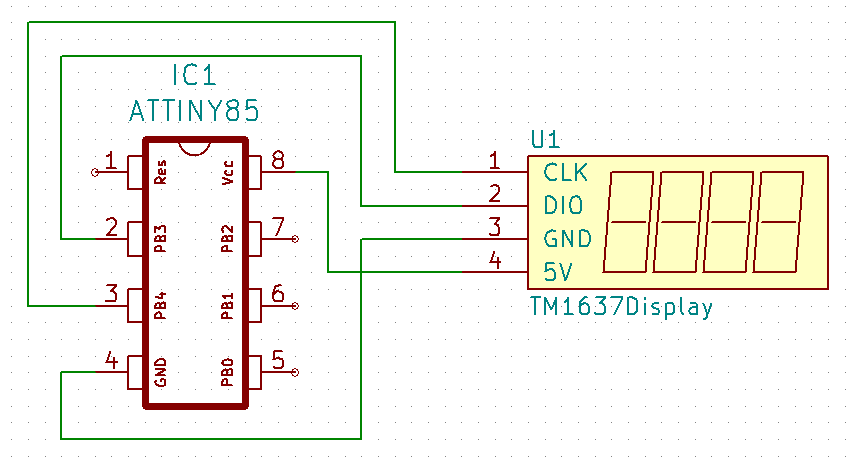
Connect module according to the following scheme. You need only two data wires to connect.
Board TM1637
Several versions of this module are sold. One version is designed to display time and therefore contains a colon as a time separator. The second version is for displaying numbers and contains a decimal point for each digit.
Library
On the Internet, you will find several different libraries for the module. I have used this library in the examples.
Examples
The example shows a sequence of numbers that change every second. It is a simple example, but it depicts almost every task that we will be doing with it. Whether it's an analog measurement, or we're gonna measure the temperature, we'll still use just one-digit display. In this example I use pins 3 and 4. If we will need these pins in the following examples to use for something else, other pins will be used in the examples.
#include <TM1637Display.h>

// Module connection pins (Digital Pins)
#define CLK 4
#define DIO 3

// The amount of time (in milliseconds) between tests
#define TEST_DELAY   1000
int counter = 0;

TM1637Display display(CLK, DIO);

void setup() {
  display.setBrightness(0x02);
}

void loop() {
  display.showNumberDec(counter, false);
  counter++;
  delay(TEST_DELAY);
}
Video
The video is located on YouTube
Source code
The source code is located on the GitHub server.
Video
10.12.2018