ATtiny85 - DS18B20 Thermometer
Zápisník experimentátora
Hierarchy: ATtiny85
In this article we will describe the project of a miniature thermometer. We will use the ATtiny85 microcontroller and the DS18B20 integrated circuit. The result will be displayed on the TM1637 display. The connection is simple and the whole project can be built on a breadboard.
We will use the following scheme. With this engagement you have already met on this page. The display is connected to pins 2 and 3. The temperature sensor is in parasitic power supply and is connected to pin 7. When connecting, be careful of pin 7. When a temperature sensor is connected, you will not be able to program the microcontroller using USBasp. It needs to be disconnected before programming the microcontroller.

List of components
We will need these components.
- ATtiny85 {linkATtiny85} - Microcontroller.
- Breadboard {linkBreadboard} - Breadboard is used for easy prototyping.
- DS18B20 {linkDS18B20} - Temperature sensor.
- TM1637 {linkTM1637} - Display.
- USBasp {linkUSBasp} - It is used to program ATtiny85.
Used libraries
We need to install the following libraries. You can use the library manager. Hypertexts on library source code can be found in the source code of the program on GitHub. The source code is listed at the end of the article.
- TM1637Display - Display control TM1637.
- OneWire - One Wire protocol.
- DallasTemperature - Control of the DS18B20 sensor in parasitic power supply. By modifying the connection, you will get the power in normal mode. There is no difference in terms of programming itself. At the start of the program, the library detects what power the sensor uses. The library adapts to this.
Program
The program is simple but contains several interesting parts. In the SEG_ERR variable, the Err text is defined, which appears on the display when it is not possible to find any DS18B20 sensor on the One Wire bus. The function setSegments is used to directly set individual LED segments to create the desired text. An example of such a situation is on the second photo.
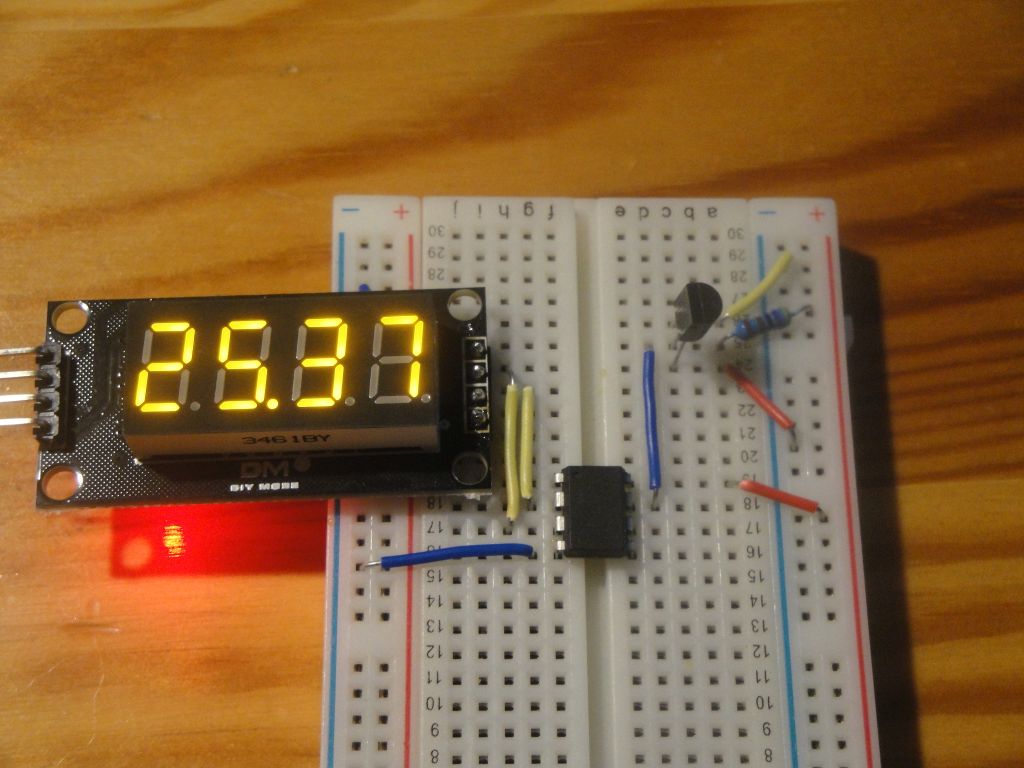
If the temperature sensor is found, the temperature is displayed on the display at the periodic intervals. The temperature is multiplied by 100 to display in the appropriate format and the decimal point is fixed to the second character. An example is the first photo. The program is not adjusted to negative temperatures. If you would like to do this, you need to think that the minus sign will need the first position on the display. The decimal point in this case should be moved to the third position.
The maximum resolution is set on the sensor and the temperature is very often obtained from it. It's set up so you can play and test how the temperature sensor responds, for example, to warmth of human fingers. I also used this example to create a video and that's why I needed to make the reaction very fast. In practice, you can quietly reduce the resolution to 10 bits and measure the temperature once a minute.
#include <TM1637Display.h>
#include <OneWire.h>
#include <DallasTemperature.h>

// Module connection pins (Digital Pins)
#define CLK 4
#define DIO 3
#define ONE_WIRE_BUS 2

const uint8_t SEG_ERR[] = {
  SEG_A | SEG_D | SEG_E | SEG_F | SEG_G, // E
  SEG_E | SEG_G,                         // r
  SEG_E | SEG_G,                         // r
  0,                                     // space
};

TM1637Display display(CLK, DIO);
OneWire oneWire(ONE_WIRE_BUS);
DallasTemperature sensors(&oneWire);

void setup() {
  display.setBrightness(0x02);
  sensors.begin();
  if (sensors.getDS18Count() == 0)
    display.setSegments(SEG_ERR);
  else
    sensors.setResolution(12);
}

void loop() {
  if (sensors.getDS18Count() != 0) {
    sensors.requestTemperatures();
    double temp = sensors.getTempCByIndex(0);
    display.showNumberDecEx(temp * 100, 0b01000000, false);
  }
  delay(1000);
}
The following picture shows the temperature measured by the DS18B20 sensor.
The following picture shows an error message that appears when the DS18B20 temperature sensor has not been found. You can see the sensor on the table beside the breadboard.

Source code
The source code is located on the GitHub server.
Video
The video is located on YouTube.
Video
20.05.2019