Teensy synthesizer
Zápisník experimentátora
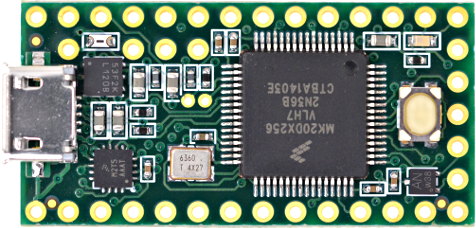
Sometimes I get interested in someone else's project. Teensy 3.2 is a powerful microcontroller that is compatible with the Arduino IDE. Dave from YouTube Channel Notes and Volts has created a series of videos that describe the construction of a synthesizer. The basis is Teensy 3.2 and Audio Board, a specialized shield for audio output. In his videos he gradually explains how to create sound, add effects, and control through MIDI. In this article, I have described each video and relevant information in each video. I have also added references to individual parts or technologies mentioned. You can find all videos created at the end of the article. The last video also includes a demo track so you can easily get an idea of what can be played with this synthesizer.
1 Basic project description
Designing synthesizers using microcontrollers is a favorite homeowner entertainment, but the result is mostly not the most beautiful 8-bit sound. It is possible, but you need a slightly better microcontroller. A good example is Pocket Operators, where you get a very decent synthesizer for a few dozen Euros in the size of a regular calculator (there is a Silicon Labs EFM32 Gecko inside).
This is the first video from the series that deals with the design of the synthesizer using the Teensy 3.2 microcontroller. This is a 32-bit microcontroller that is well integrated into the IDE Arduino. He uses Teensy and Audio Board to create a synthesizer, which is a handy board where all audio accessories are plugged in and provides 16-bit resolution on everything (inputs and outputs). The synthesizer can also be created without it, but then the audio quality of the outputs is lower.
The video shows the basic creation of audio library objects in the online tool that generates the synthesizer source code. And then it shows how to load it into the microcontroller and how to run it all.
Teensy Audio Library is a specialized library for creating sounds. It contains dozens of different classes that serve to create music. It is used by first creating a program skeleton in an online tool. You choose the list of inputs, outputs, synthesizers, and effects you use, link them to each other, and create a synthesizer. You will then complete this program skeleton with your code to build the resulting sound.
- PO
- Teensy 3.2
- Audio Board
- Teensy homepage
2 Pure Data
Second video about synthesizer creation. In the video, he created a synthesizer from two oscillators with a sawtooth and one pink noise oscillator. It has connected to a mixer whose output goes to the i2s output (Audio Board). It has fixed frequencies set on oscillators. Such a synthesizer may seem simple at first glance, but it is basically the same as you will find in many professional synthesizers. Although they have a richer set-up options, two oscillators that can be combined together in different ways are good enough to create an interesting sound.
It controls it through Pure Data, where he creates 3 sliders for the oscillators, which send data via MIDI to Teens as MIDI Control Change Messages. Finally, he mixes the individual oscillators and shows how this is reflected in the resulting sound.
Pure Data is an interesting tool for programming music. It can simulate the same thing he does in Dave's video. It can create a sound source for the synthesizer. The program is mainly used because Teensy can be connected to a computer as a MIDI device and can be easily controlled via MIDI. This allows it to comfortably design a synthesizer without having to connect potentiometers to the microcontroller at this stage and resolve any design changes on a breadboard.
- Pure Data
3 Keyboard
He added a MIDI keyboard in the third Teensy synthesizer video. He uses a USB model that is connected to a computer. That is why he added MIDI In in Pure Data and linked it directly to MIDI Out, bringing each note from the keyboard to Teensy.
Then there is a Vradio object with five items. This will create a number that will be 0-5 and send this number to the Teensy via MIDI Control Change. In the last post I mentioned that there are two oscillators in Teensy. He uses this number to play the same note on the first oscillator as it does from the MIDI keyboard and on the second he moves it by -2 to +2 octaves. Who is not proficient in the technical nature of music, a one-octave tone shift means doubling the frequency. And a frequency shift of exactly one octave is very pleasing to the human ear, so its shifts on the other oscillator are perceived as an interesting compaction of the original sound. This is also what the musicians commonly use when they play a chord, for example, they automatically duplicate the chord's basic note and play it an octave lower, even though they don't have it in the notes.
The last interesting thing about the video is how it dealt with the fact that it has a mono synthesizer (only one note plays at a time) and tries to play more keys at once. It has a program-defined LIFO buffer for MIDI notes. He inserts notes into the buffer as they were pressed and removes the note from the buffer when it is released and plays it again if there is any note underneath it. It achieves the appearance of polyphony.
4 ADSR
The fourth video about the Teensy synthesizer. In a simplified form, ADSR is an envelope that shapes the tone volume. This gives the played tone a credibility, because if you imagine the sound that is generated by pressing one of the keys on the piano, you have the strongest sound just after pressing, which gradually disappears. Very similarly, the sound is formed in the synthesizer, where you can adjust its start (A), then mute (D) to (S), where the sound stays on one volume until the key is released, after which the volume level is 0 (R). As quickly as the individual steps happen, it has a huge impact on the resulting sound.
The second part of the video is just a beautification of the PureData adjusters, which is a part that you can easily ignore.
5 Wave shape
Fifth video about Teensy synthesizer. Here we come to an interesting sound. Finally, we can see why two oscillators were used in the first video. He added two important functions to the program. The first is to choose a shape that can choose between sine, triangular, saw and rectangular signals. This can be done on each oscillator separately.
The second important change is the ability to use the detune function on the second oscillator. This is to be seen as an option to adjust the second oscillator frequency by up to 5 percent down. This gives the resulting sound a lot of interest, as two nearly equal frequencies start to mix and vibrate very strangely in the ear. Especially when it is used on low tones, as shown in the video. Of course, there is no need to overdo it with the detune function, it is heard that when it pulls to a higher value, it is already getting uncomfortable and disgruntled.
6 Filter
Sixth video in order. He added a new filter and plugged it in as a low pass filter. Basically, it works just like a similar circuit that can also be done with parts. There are two parameters in the filter, the cut-off frequency and the resonance value. The filter is a power hungry feature and takes 4 percent of Teensy's power.
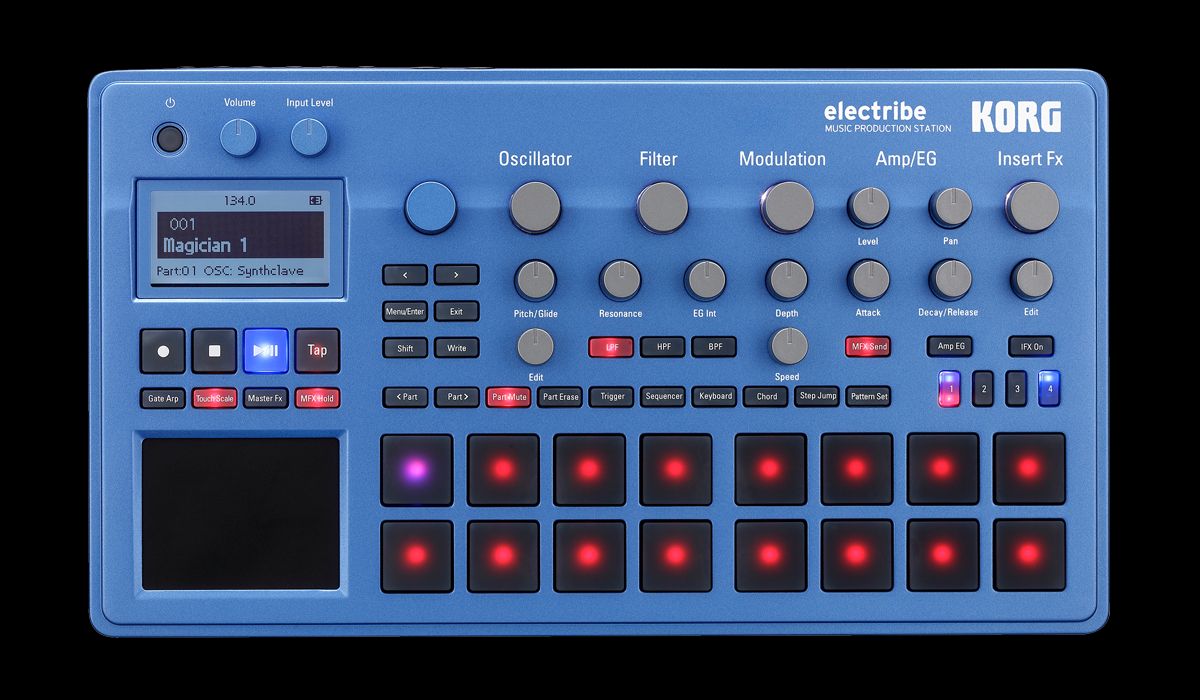
But it has a great influence for synthesizer synthesis. It is not always desirable that all frequencies go to the output. Their cutting with LPF makes it possible to create interesting effects. If you ever sit for a real synthesizer, you will have a lot of fun with this control. Other filters are often used in addition to LPF, but are not mentioned in this series of videos. For example, the Korg Electribe 2 music instrument contains a large number of filters of this kind.
- LPF
- Electribe 2
7 Pitch Bend
Seventh episode. Pitch Bend Wheel. A bit boring episode where almost all the space is devoted to calculations. The Pitch Bend Wheel is a hard-to-reach part and when you get it, it costs almost as much as a cheaper MIDI controller with built-in Pitch Bend. And if you don't have a sense of when to use this feature to fine-tune the tone frequency, you'll get strange results that won't sound very good.
8 LFO
Part number 8. LFO - Low Frequency Oscillator. Basically, it is a change of parameters using a low frequency, which creates effects as if you were twisting some potentiometer on the synthesizer up and down. The potentiometer can control various parameters, creating a variety of subtle variations in sound. The LFO does these things quickly and precisely for you, and the musician usually only sets what to modify and then just plays the notes. In the video, the LFO sets the filter and the pitch. It needs to be heard and at least half of the video gives enough music samples as it actually works.
9 MIDI input
Part number 9. MIDI. In previous episodes, Teensy was connected via USB as MIDI. This connection remained, but it also added a classic 5-pin MIDI input. MIDI connection is notoriously known and the recommendation is kept in the scheme. He has an optoisolator that separates its SQ-1 MIDI sequencer from Teensy. At the end of the video, it is also seen as Teensy processes the signals from both sources and notes from SQ-1 and from the PureData CC messages, which also was used to chang the synthesizer parameters in previous parts.
10 Hardware
Part no. 10. From Pure Data to Hardware.
In previous parts, he had all the controls on the computer in Pure Data and sent the parameters to Teensy via MIDI. Now he shows how to connect 15 potentiometers through an analog multiplexer and what algorithm he uses to not spend too much time checking each potentiometer.
11 Enclosure
Part no. 11. The printed circuit board and the aluminum enclosure.
He describes in detail how he proposed to fit all the connectors and potentiometers there, and also shows how the box is drilled and labeled on it.
12 Demo
The last video is a demo song. Many amateur synthesizer makers forget about this. They create a synthesizer and devote a lot of time to showing what individual sounds they can create. But the finished song is much better proof of the author's abilities. And this electronic song can also be listened to.
Video
30.06.2019