For Beginners: Delayed Switch-off
Zápisník experimentátora
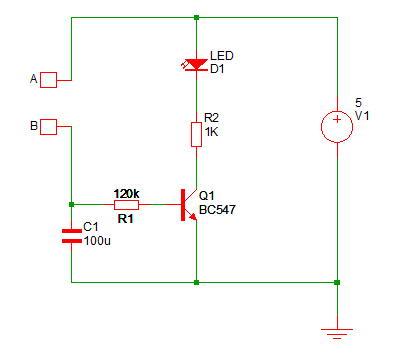
We will build on the previous article on NPN transistors. Here, we have learned that the transistor current gain causes a very small current across the transistor base to generate much larger current between the collector and emitter. By adding a capacitor to the electrical circuit, we can change this circuit to a delayed switch-off.
The circuit in the figure has a capacitor C1 of 100 μF. The capacitor serves as an energy reservoir. It charges quickly when the button is pressed and supplies the transistor base when the button is released. Since we have a large resistor R1 at the base of the transistor, it will take a few seconds for the current across the transistor base to drop to such a small value that it will not be enough to light up the LED. Because I used the blue LED, it will light up for a long time. For example, if you use a red LED, the LED will be shorter.
Parts list
We need these parts.
- Breadboard {linkBreadboard}
- Power supply {linkPowerSupply}
- Resistor 1k, 120k {linkR}
- LED diode {linkLED}
- NPN Transistor BC547B {linkTransistor}
- Push button {linkButton}
- Connecting wires
- Arduino {linkArduino}
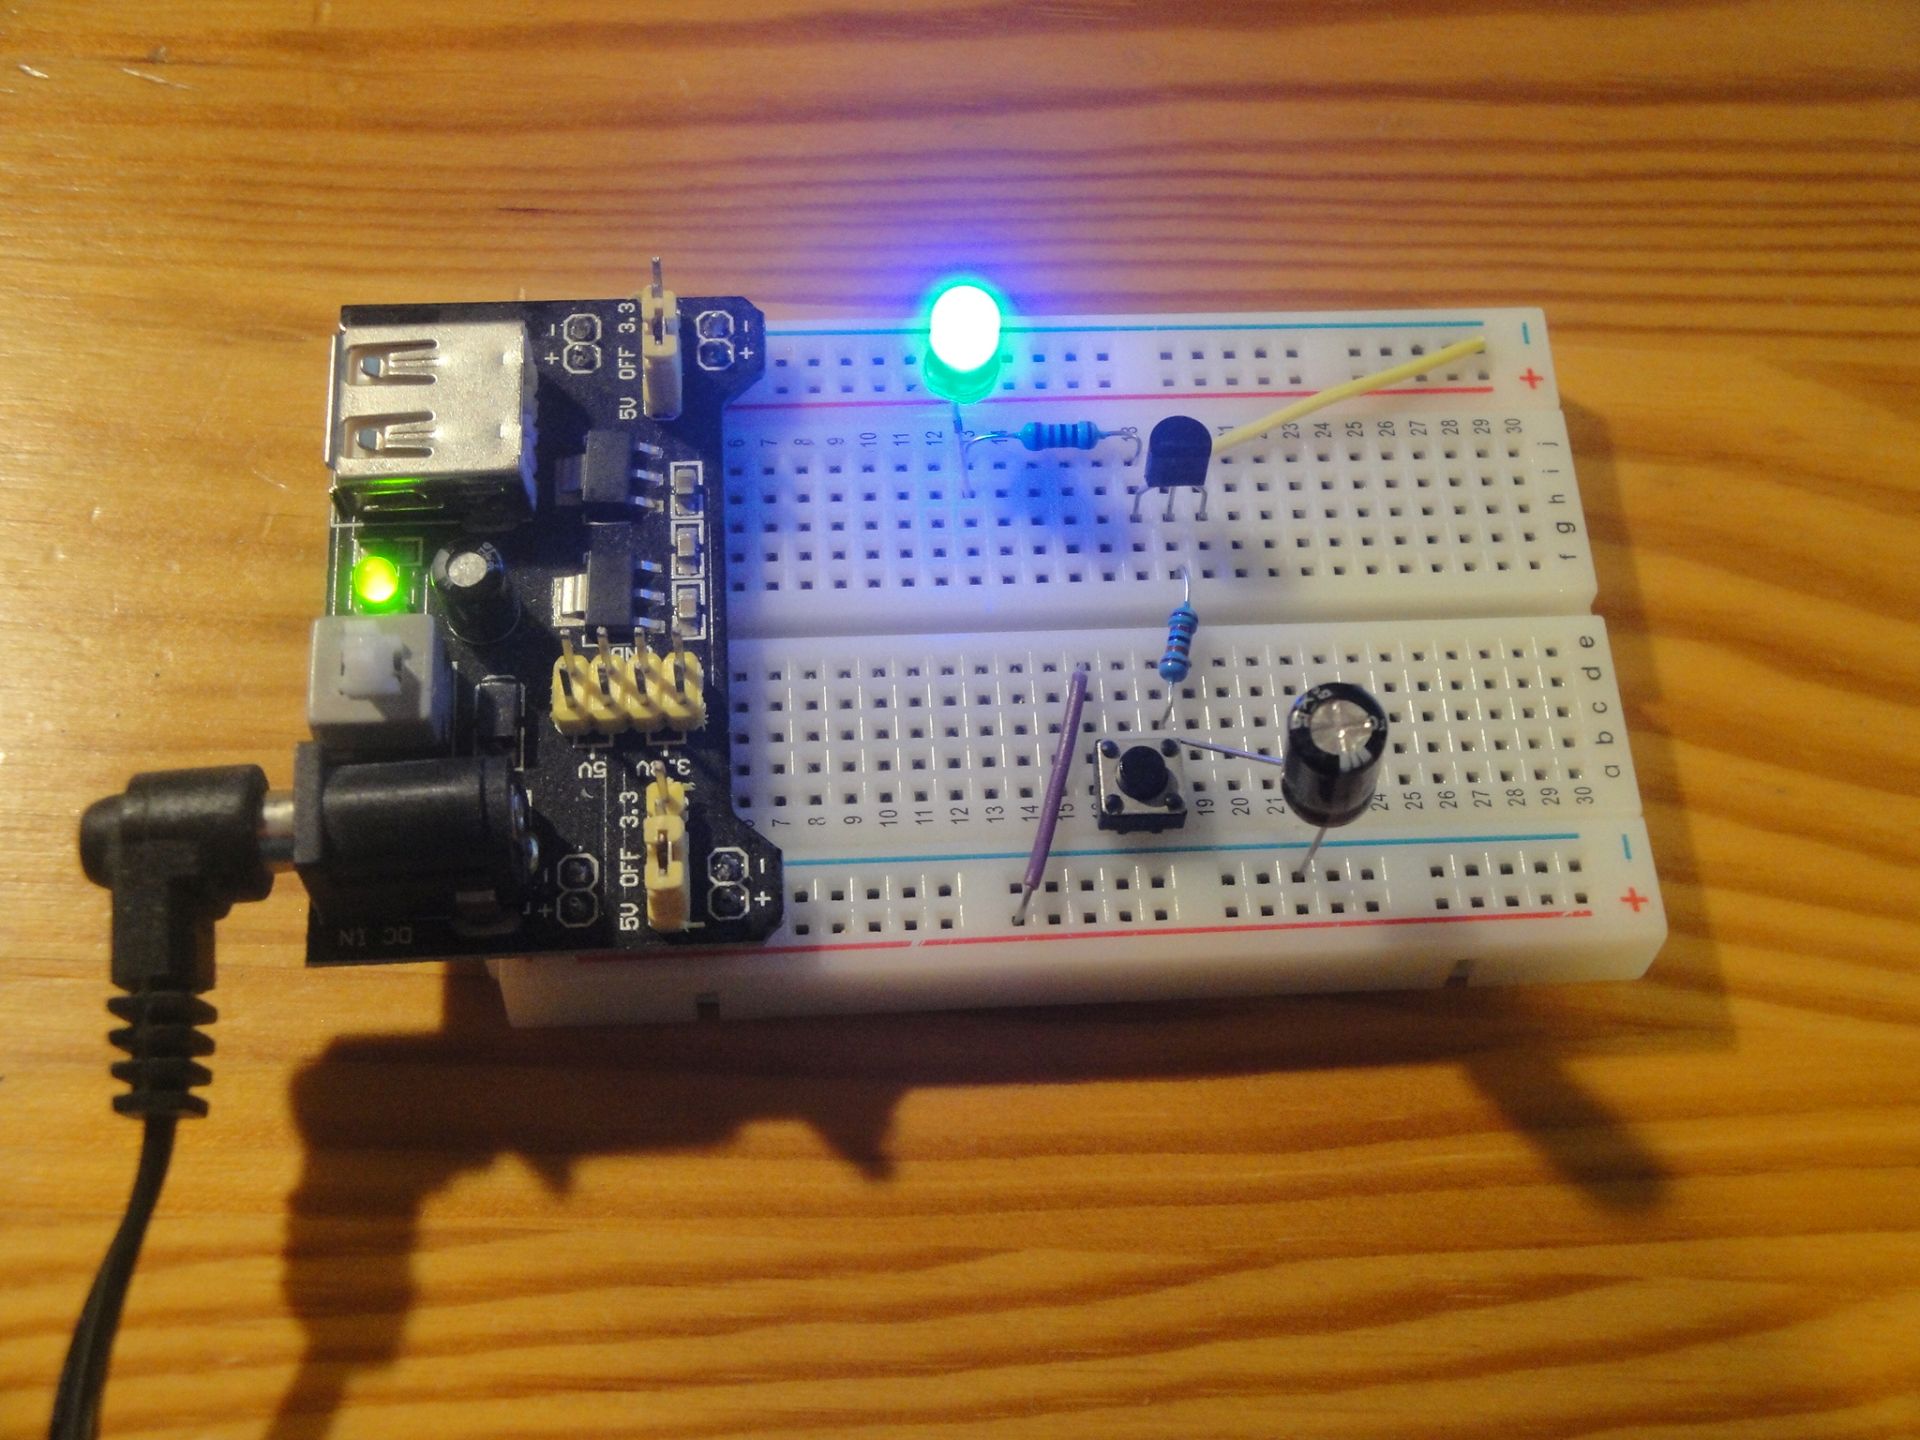
The figure shows all the components connected according to the scheme. The LED is lit because I pressed the button just before shooting and the capacitor is sufficiently charged.
RC time constant
In the electrical circuit it is possible to calculate how long it will take to discharge the capacitor through the resistor. The formula is simple.
τ = R x C
But in fact it is not a complete discharge, but it is a discharge of 36.8% of the original voltage. In this case, the result should be 12 seconds. But as I wrote, the LED will be shining longer, only its brightness will not be as intense as it will flow less and less.
Arduino
You can use Arduino again to visualize the capacitor voltage. Use the code from the previous article to measure between C1 and R1. You should get a nice curve with the progress of the capacitor discharge through the resistor.
Source code
The source code is located on GitHub.
Video
22.07.2019