LED Strip dimmer - Hardware v. 1.1
Zápisník experimentátora
Hierarchy: Stmievač LED pásika pomocou ATtiny85
In this blog you will find a slight improvement of the dimmer design. In the first version I made some minor bugs that I've fixed here. If you want to build your own dimmer, go out of this construction.
Scheme
List of changes to the previous version.
- I added the
C4filtering capacitor to power the microcontroller. Previously, his role was partly fullfilled with capacitorC2. - I added an external pull-up resistor
R8to the microcontroller reset pin. - I added the
K2andK3connectors toPB3andPB4pins. This was already on the supplied boards, but in schema 1.0 it was not marked. - I added the
J1connector to pinPB2.

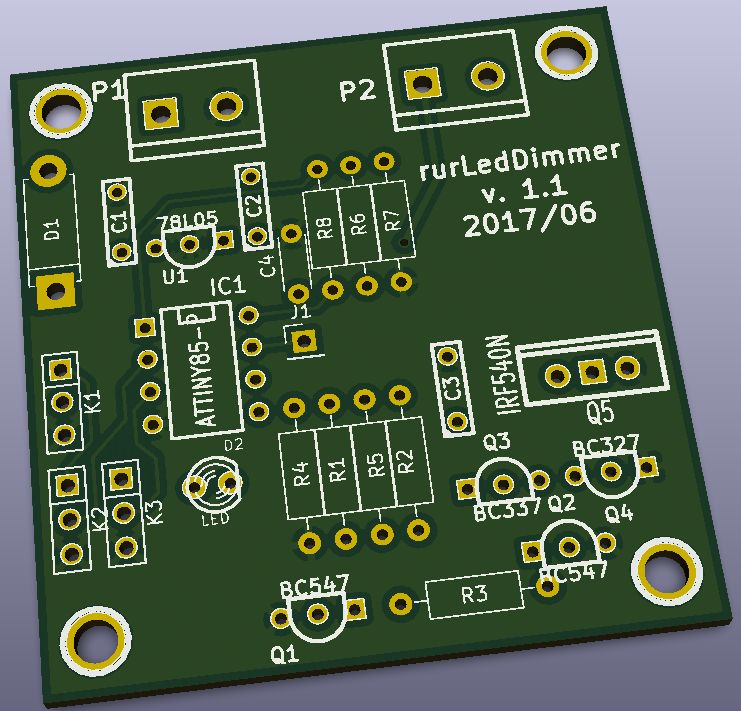
PCB
Board in KiCad.

3D view of the board in KiCad.
Production of the board
List of parts.
| ID | Value | Package/Comment |
|---|---|---|
| P1, P2 | 2pin | The 12 V power supply leads and LED strip wires are fastened using screws. In Chinese stores, this type of connector is sold as a KF301-2P 5.08mm Blue Connect Terminal Screw Terminal Connector. |
| K1, K2, K3 | 3pin | If necessary, use a pin header or direct wire feed. Usually, only K1 is required, but for example, software version 1.3a also needs K2. |
| J1 | 1pin | If someone needed pin PB2. |
| C1 | 0.33u | Ceramic. |
| C2, C4 | 0.1u | Ceramic. |
| C3 | 10u | Electrolytic. |
| U1 | 78L05 | TO92 |
| IC1 | ATtiny85 | DIP8 (It must be programmed outside of the board) |
| D1 | 1N4001 | Or 1N4007. |
| D2 | LED | For example, blue. |
| R1, R2, R3, R5 | 1k | |
| R4 | 4k7 | |
| R6 | 10R | |
| R7, R8 | 10k | |
| Q1, Q2 | BC547 | TO92, NPN |
| Q3 | BC337 | TO92, NPN |
| Q4 | BC327 | TO92, PNP |
| Q5 | IRF540N | TO-220, MOSFET |
I do not have the board yet, but I do not expect any errors in it because I just edited the original board. So far, I'm going to have the production files on OSH Park. There, for 3 boards, you pay approximately $ 18.
GitHub
You can find files for KiCad on the server. In the GBR directory you will find ZIP files that you can send to production. For example, DIRTYPCBs shows an approximate price of $ 14 per 10 boards.
01.07.2017