Arduino and MIDI out
Zápisník experimentátora
Hierarchy: MIDI
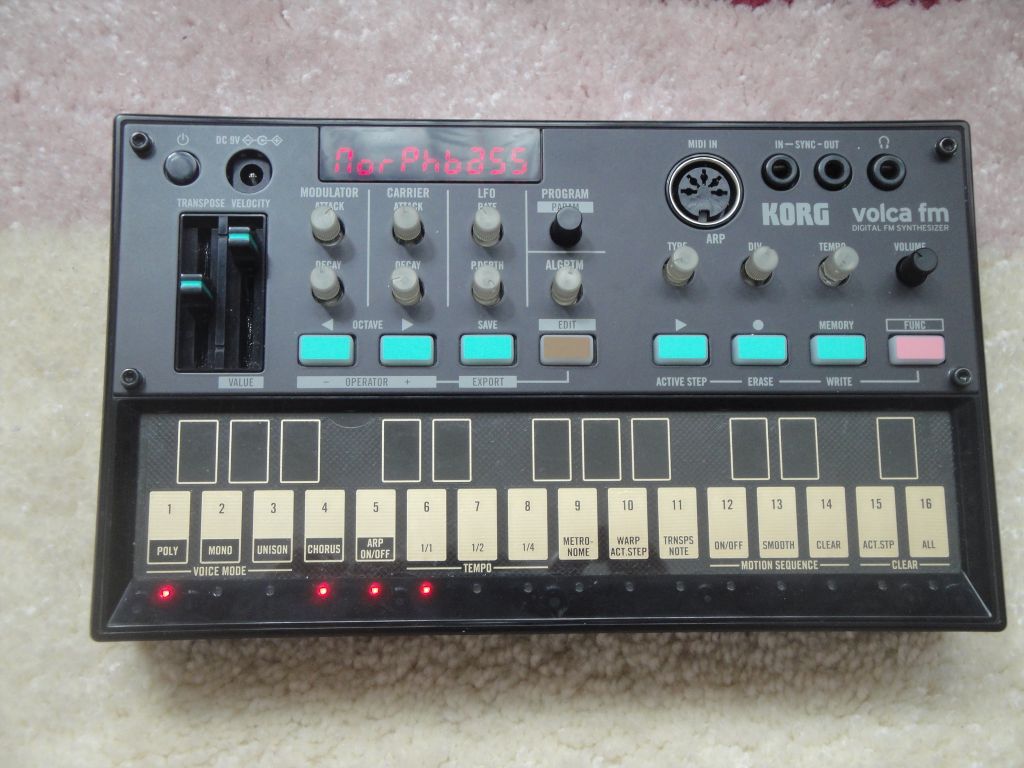
In this article, we'll show how we can use musical instruments using Arduino. We will use the MIDI protocol, a serial protocol that sends messages to musical instruments. The instruments by the sent message know what note they are about to play. I will use the Korg Volca FM synthesizer in the preview. But you can use any musical instrument that has MIDI input.
MIDI
MIDI is an abbreviation for the Musical Instrument Digital Interface. You can read about the MIDI in more detail on Wikipedia. For us, like Arduino users, we just need to know that the messaging MIDI can use the same serial protocol by which we communicate with the computer. What is important is only the set speed that is 31250 b/s.

There is an Arduino MIDI Library available to send MIDI messages. You can install it using Library Manager. The library contains all necessary functions to send notes to the synthesizer. You do not have to worry about the details of implementing the MIDI protocol itself. That is why we can concentrate on the very creation of music.
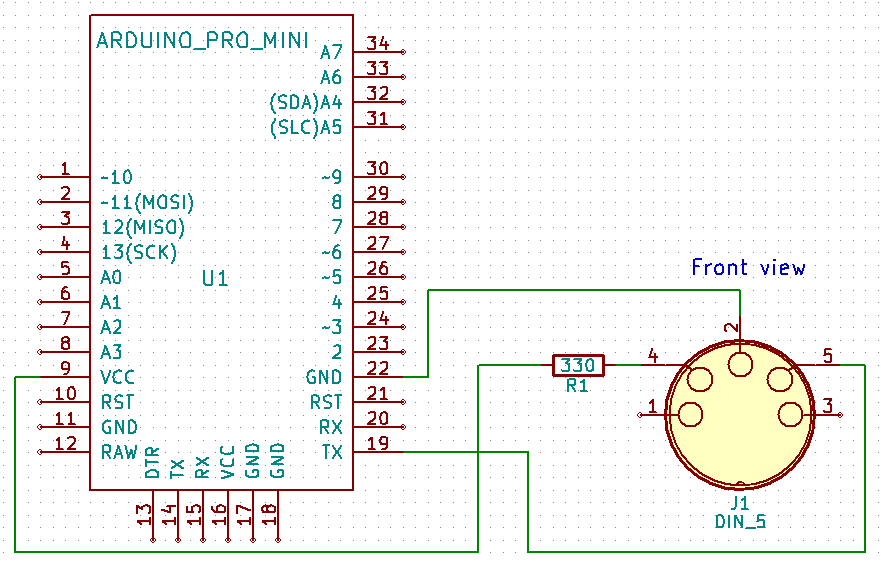
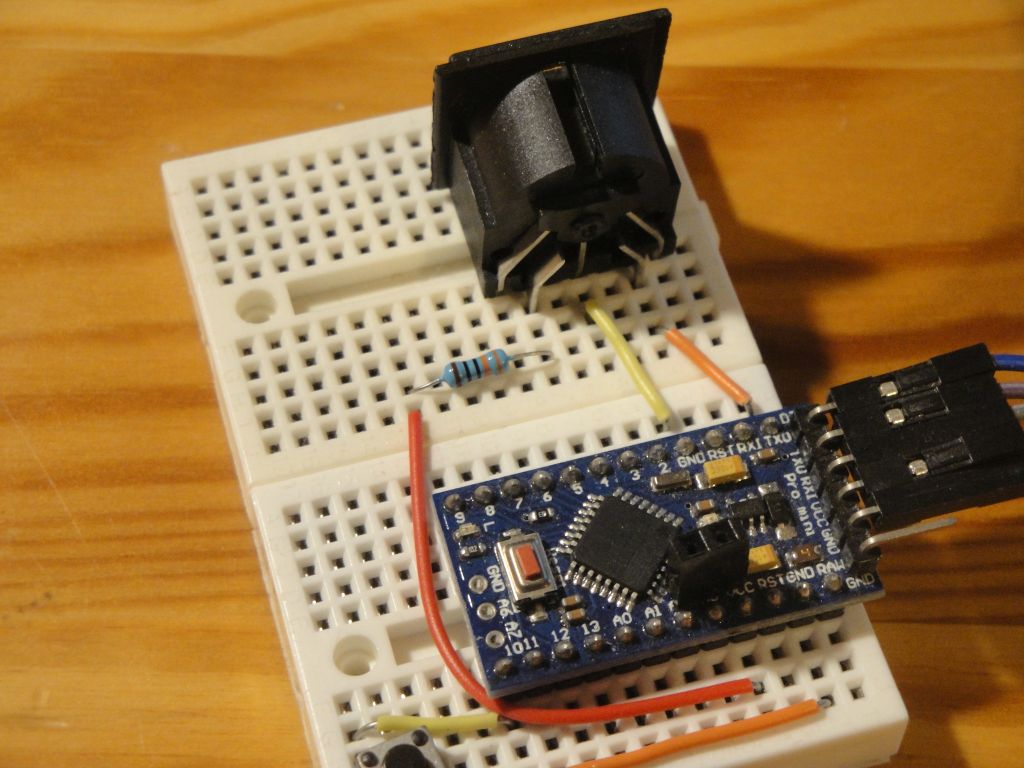
Electrical circuit connection
MIDI uses a DIN connector. Connecting MIDI out is simple. You use one resistor to connect to pin 4 of the connector. Pin 5 is connected directly to the TX in Arduino. The original scheme uses resistor 220R. I used the 330R. Nowadays, we can do this because, on the other side, the musical instrument will have an optoisolator and our part of the electric circuit will be supplying an LED diode in the optoisolator. Even with the 330R resistor, the diode in the integrated circuit will sufficiently transmit the Arduino signal to the musical instrument.
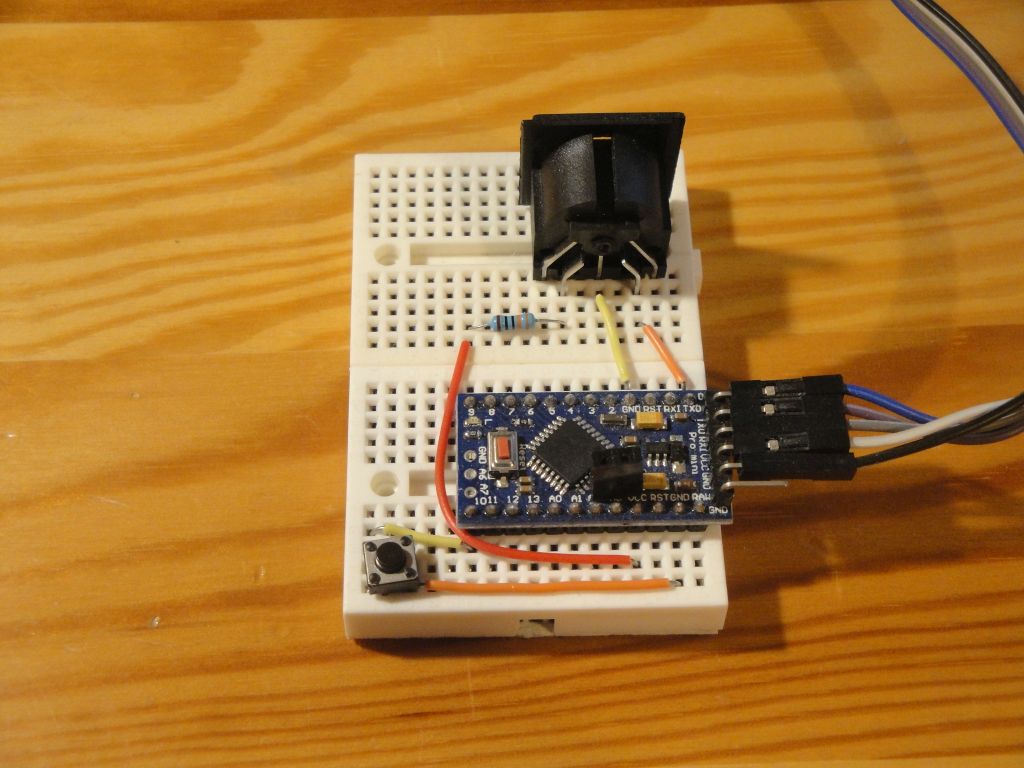
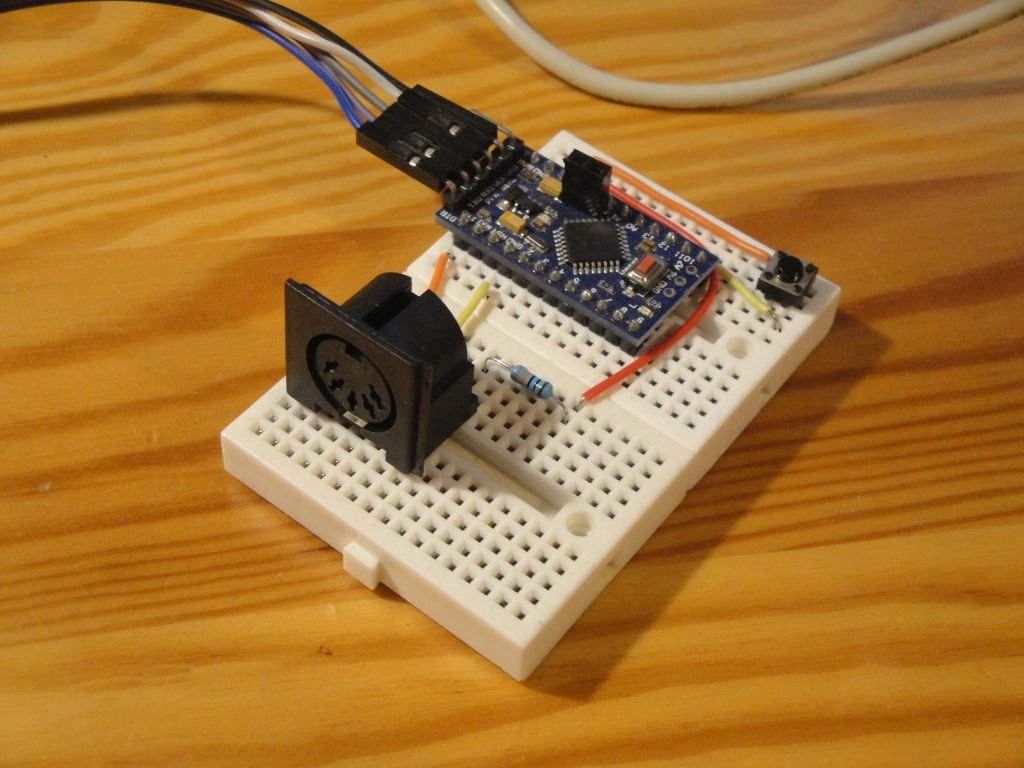
In the article, you will find some photos on the breadboard that you can use to connect the same electrical circuit. MIDI in will be part of some more follow-up to this article.
Such electrical circuit connection is used when you connect a hardware serial port. Arduino Uno has only one serial port and is also used to program Arduino itself. But this is not a problem, because programming of Arduino via bootloader works at a different speed and the musical instrument will ignore the sent data. Exceptionally, the musical instrument in the sent data can recognize a MIDI message and occasionally can play a random tone when programming Arduion.
If you are not satisfied with this, you can solve this by unplugging the DIN connector or by using the SoftwareSerial on another pin while programming Arduino. All of the Arduino programs that are part of this article assume that you are involved in this scheme.
Examples
In choosing examples, I've been wondering for a long time what to choose as a demonstration. Finally, I chose two scales. One base on which every beginning musician trained fingering and the second mysterious, blues-like one everyone wants to know but for which we do not have enough time or patience, so we prefer to let musicians feed on the music. The scales have the advantage of quickly understanding them, knowing which keys you have to press and then endlessly training them for a long time. Your fingers do not obey to you at first, you feel like you are not going anywhere, but one day your fingers will stop being entangled and finally it gets hot.
Students in the music school have it harder, they have to train the scales and they do not play a lot. If you learn by yourself, you will try to ignore this part and try to play something and when you get back to it, you will return to the scale and you will at least train it, because you will find that it helps you play and after time your fingers are self-indulgent they move to the keys where they should be to be able to play notes in a song.
But it was just a funny thing, on the scale it is good that it is basically the same mathematics and we will use it well in the examples. This article will also feature a video where you can listen to both scales, played using Arduino and the synthesizer.
Scale C major
The C major scale is played by stepping down all the white keys. In the program, the scale is played first upwards and then played down. In the program, I have marked specific notes and the MIDI note values. We have to send it to the musical instrument. Note that MIDI notes do not have values that go exactly behind each other. Missing numbers are black keys that are not used in C major.
Each note in the program takes 400 ms. This means that in about one second, about 2 notes are played. This corresponds to a speed of 120 BPM. It's not exactly, but it's enough for the purpose of this experiment. In the video, note which keys I press while playing a finger with your finger. The VolcaFM has a touch keyboard, which is not ideal for live play but can also learn to play on such a keyboard.
#include <MIDI.h>

MIDI_CREATE_DEFAULT_INSTANCE();
const int channel = 1;
//                   C   D   E   F   G   A   H   C   C   H   A   G   F   E   D   C
const int notes[] = {60, 62, 64, 65, 67, 69, 71, 72, 72, 71, 69, 67, 65, 64, 62, 60};
const int cnt = sizeof(notes) / sizeof(int);

void setup() {
  MIDI.begin();
}

void loop() {
  int note;
  for (int i = 0; i < cnt; i++) {
    note = notes[i];
    MIDI.sendNoteOn(note, 64, channel);
    delay(400);
    MIDI.sendNoteOff(note, 64, channel);
  }
}
Blues Scale
This scale sounds a bit different. Black keys are also used. I hope I was not mistaken, but the scale is labeled as a six-tone C minor blues scale (hexatonic). It sounds sad because it's a minor scale. I'll play this scale with my fingers on the synthesizer to get a good idea of which tones are playing.
Both scales are good for testing whether you have a right electrical circuit. In the continuation of this article, we will try to get a melody from my synthesizer, and the demonstrations will be somewhat more complicated with these examples.
#include <MIDI.h>

MIDI_CREATE_DEFAULT_INSTANCE();
const int channel = 1;
//                   C   Eb  F   Gb  G   Hb  C   C   Hb  G   Gb  F   Eb  C
const int notes[] = {60, 63, 65, 66, 67, 70, 72, 72, 70, 67, 66, 65, 63, 60};
const int cnt = sizeof(notes) / sizeof(int);

void setup() {
  MIDI.begin();
}

void loop() {
  int note;
  for (int i = 0; i < cnt; i++) {
    note = notes[i];
    MIDI.sendNoteOn(note, 64, channel);
    delay(400);
    MIDI.sendNoteOff(note, 64, channel);
  }
}
Video
In order to make clear what Arduino plays, I first will play with my fingers on the keyboard of the synthesizer and then the Arduino will play the same notes.
Source code
The source code is located on the GitHub server.
16.07.2018