Arduino USB MIDI in - Ableton Live 10
Zápisník experimentátora
Hierarchy: MIDI
Connecting Arduino to a computer as a USB MIDI is not difficult. All you need is the Arduino Pro Micro, which includes the ATmega32U4 microcontroller. This microcontroller can be directly connected to USB. It can be set to behave like a MIDI device. This allows Arduino to send or receive notes using MIDI.

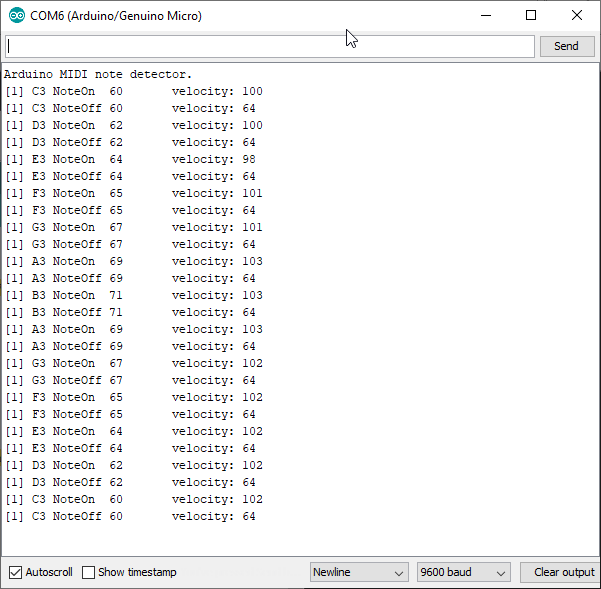
Since the topic of this article is sending MIDI notes to Arduino, it is best if you watch the video first. The video shows an example of Arduino's connection to Ableton Live 10. Ableton has a track with several notes that are sent to Arduino via MIDI. Arduino decodes the notes and writes them to the serial port. The serial port works in conjunction with MIDI, so you can use it to check what is happening on MIDI. The program is set to read MIDI messages in MIDI_CHANNEL_OMNI mode. This allows you to read MIDI messages on each channel. In the video, notes are sent first on channel 1 and then on channel 3.
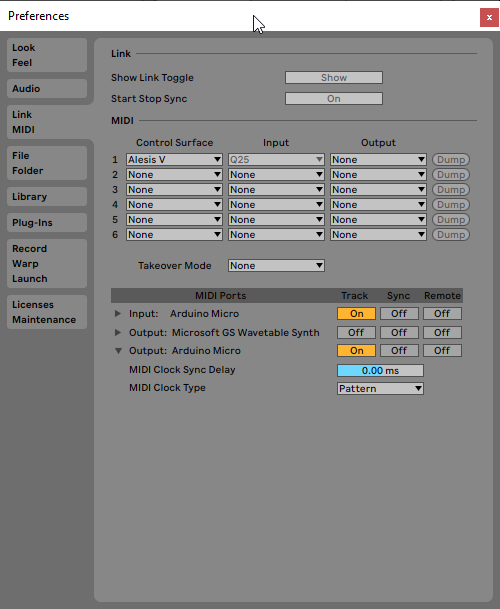
You don't have to worry about setting up Ableton Live 10, as Ableton will set everything up as you need it when you connect Arduino.
Parts list
You will need the following parts:
- Arduino Pro Micro {linkArduino}
All you need to do is load the following program into Arduino and run Serial Monitor.
Used libraries
The program uses these libraries.
- MIDI Library - Universal MIDI library.
- MIDIUSB - The previous library uses this library for its activities.
The sketch
The program is just a slightly modified example that comes with the library. Noteworthy is the function printNoteName, which translates the MIDI note number into a better name. The function calculates the octave as calculated by Ableton Live 10. In fact, however, the octave number is not fixed in any way, and you may encounter a different octave name in different programs or different musical instruments.
#include <MIDI.h>
#include <midi_UsbTransport.h>

static const unsigned sUsbTransportBufferSize = 16;
typedef midi::UsbTransport<sUsbTransportBufferSize> UsbTransport;

UsbTransport sUsbTransport;

MIDI_CREATE_INSTANCE(UsbTransport, sUsbTransport, MIDI);

const char *notenames[] = {"C", "C#", "D", "D#", "E", "F", "F#", "G", "G#", "A", "A#", "B"};

void printChannel(int inChannel)
{
  Serial.print("[");
  Serial.print(inChannel);
  Serial.print("] ");
}

void printNoteName(int note)
{
  int octave = note / 12;
  int nnumber = note % 12;
  Serial.print(notenames[nnumber]);
  Serial.print(octave - 2);
}

void handleNoteOn(byte inChannel, byte inNumber, byte inVelocity)
{
  printChannel(inChannel);
  printNoteName(inNumber);
  Serial.print(" NoteOn  ");
  Serial.print(inNumber);
  Serial.print("\tvelocity: ");
  Serial.println(inVelocity);
}

void handleNoteOff(byte inChannel, byte inNumber, byte inVelocity)
{
  printChannel(inChannel);
  printNoteName(inNumber);
  Serial.print(" NoteOff ");
  Serial.print(inNumber);
  Serial.print("\tvelocity: ");
  Serial.println(inVelocity);
}

void setup() {
  Serial.begin(115200);
  while (!Serial);
  MIDI.begin(MIDI_CHANNEL_OMNI);
  MIDI.setHandleNoteOn(handleNoteOn);
  MIDI.setHandleNoteOff(handleNoteOff);
  Serial.println("Arduino MIDI note detector.");
}

void loop() {
  MIDI.read();
}
Source code
The source code is located on the GitHub server.
Video
30.09.2019