ESP8266
Page
Stránky / Arduino / Arduino - Zoznam základných dosiek /
ESP8266 is a cheap Wi-Fi enabled chip. The manufacturer of the chip is Espressif Systems. The chip originally appeared on the market as AT commands Wi-Fi modem. It should serve as an inexpensive module for other microcontrollers. Later, people discovered it was a powerful microcontroller and can be programmed separately. It can be programmed in many languages, but on this site we will only focus on its integration into the Arduino IDE environment.
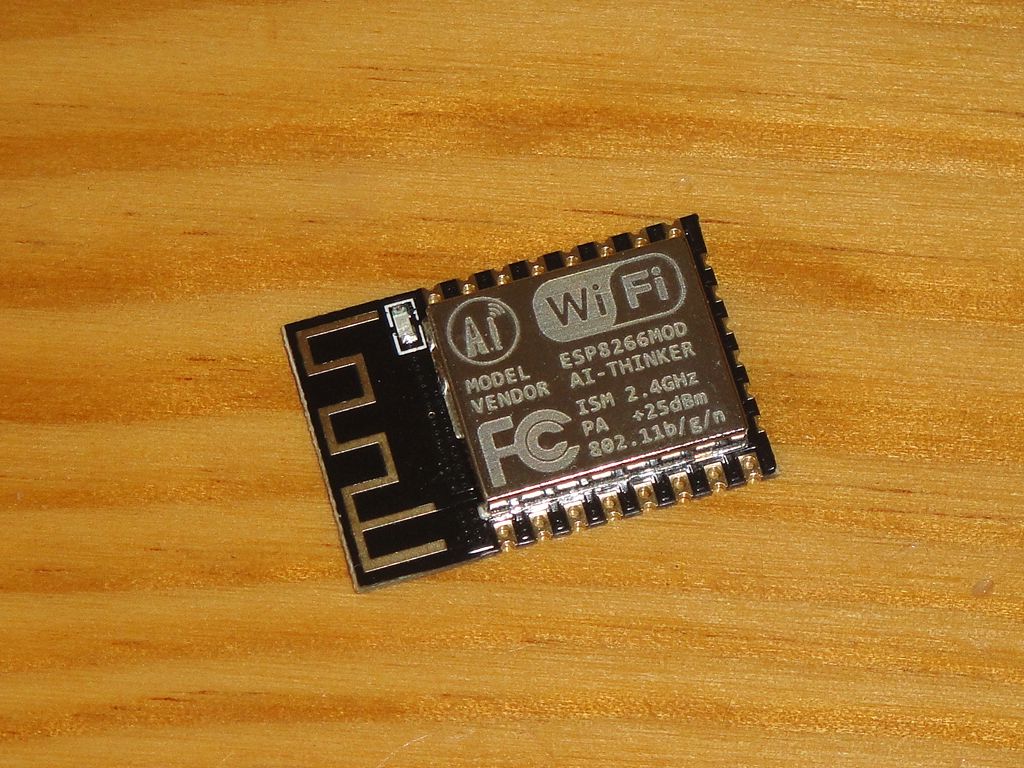
ESP8266 is a System on a Chip (SoC). It includes a 32-bit Tenslica L106 microcontroller and a Wi-Fi transmitter. It has 11 GPIO pins and one analog input. In fact it has 17 pins, but 6 pins are used to connect flash memory. Thanks to GPIO and analog pins, you can program it as normal Arduino. In addition, Wi-Fi communication is available. With it, you can connect to the Internet, create custom servers to connect to from your computer or mobile.
You can buy a lot of modules or finished development boards. The modules are referred to as ESP-XX and manufactured by AI Thinker. Development boards usually have the label NodeMCU or WeMos. They differ from each other by the amount of pins, the shape of the antenna and the size of the flash memory.
Programming
I am only interested in programming through Arduino IDE. If you already had Arduino in hand, ESP8266 programming will be very similar to you. But it is not the only option. There are others. If you want to experiment and find the best solution for yourself, here is a list of other options.
- Official SDK in C language
- LUA interpreter
- MicroPython
You'll need
To be able to program, you need these things.
- ESP8266 board
- A computer on which you can run the Arduino IDE
- USB-Serial converter that works at 3.3V. Some boards have it built-in.
- USB cable
- 3.3V power supply. Some boards have it built in.
- Wi-Fi network
Selection of the board
If you just start with ESP8266, choose the complete board that has everything. All boards can be plugged into a breadboard and have a USB cable connector. Only when you gain some experience you can go to build your own board directly from the modules.
What you need to know about ESP8266?
Important informations.
- The ESP8266 works at 3.3V. You can not connect it directly to 5V.
- ESP8266 does not have 5V tolerant pins. In some sources, you find information that they are tolerant, but do not rely on it.
- ESP8266 is able to supply a current of only 12 mA from the pin. This is a big difference to Arduino, where you can safely deliver 20-40 mA.
- ESP8266 has only one analog-to-digital converter that has an unusual range of 0-1 V. On some boards (eg NodeMCU) this input is adjusted to allow 0-3.3V.
Add ESP8266 support to Arduino IDE
The source texts are located on GitHub. But just read the installation procedure. You can install the board directly in the IDE.
- Use the File/Preferences menu command.
- Insert URL http://arduino.esp8266.com/stable/package_esp8266com_index.json into Additional Board Manager
- ESP8266 appears in the list of boards.
- You install it according to the instruction. Installation takes a few minutes.
Installing drivers for USB-Serial converters can also be part of the installation. If you installed the converters because of Arduino, you can already have them installed. If not, find the chip name and you must download and install the driver. On some operating systems, installation may be automatic, and the operating system will install the driver itself after you plug the USB board.
Which ESP8266 boards are supported
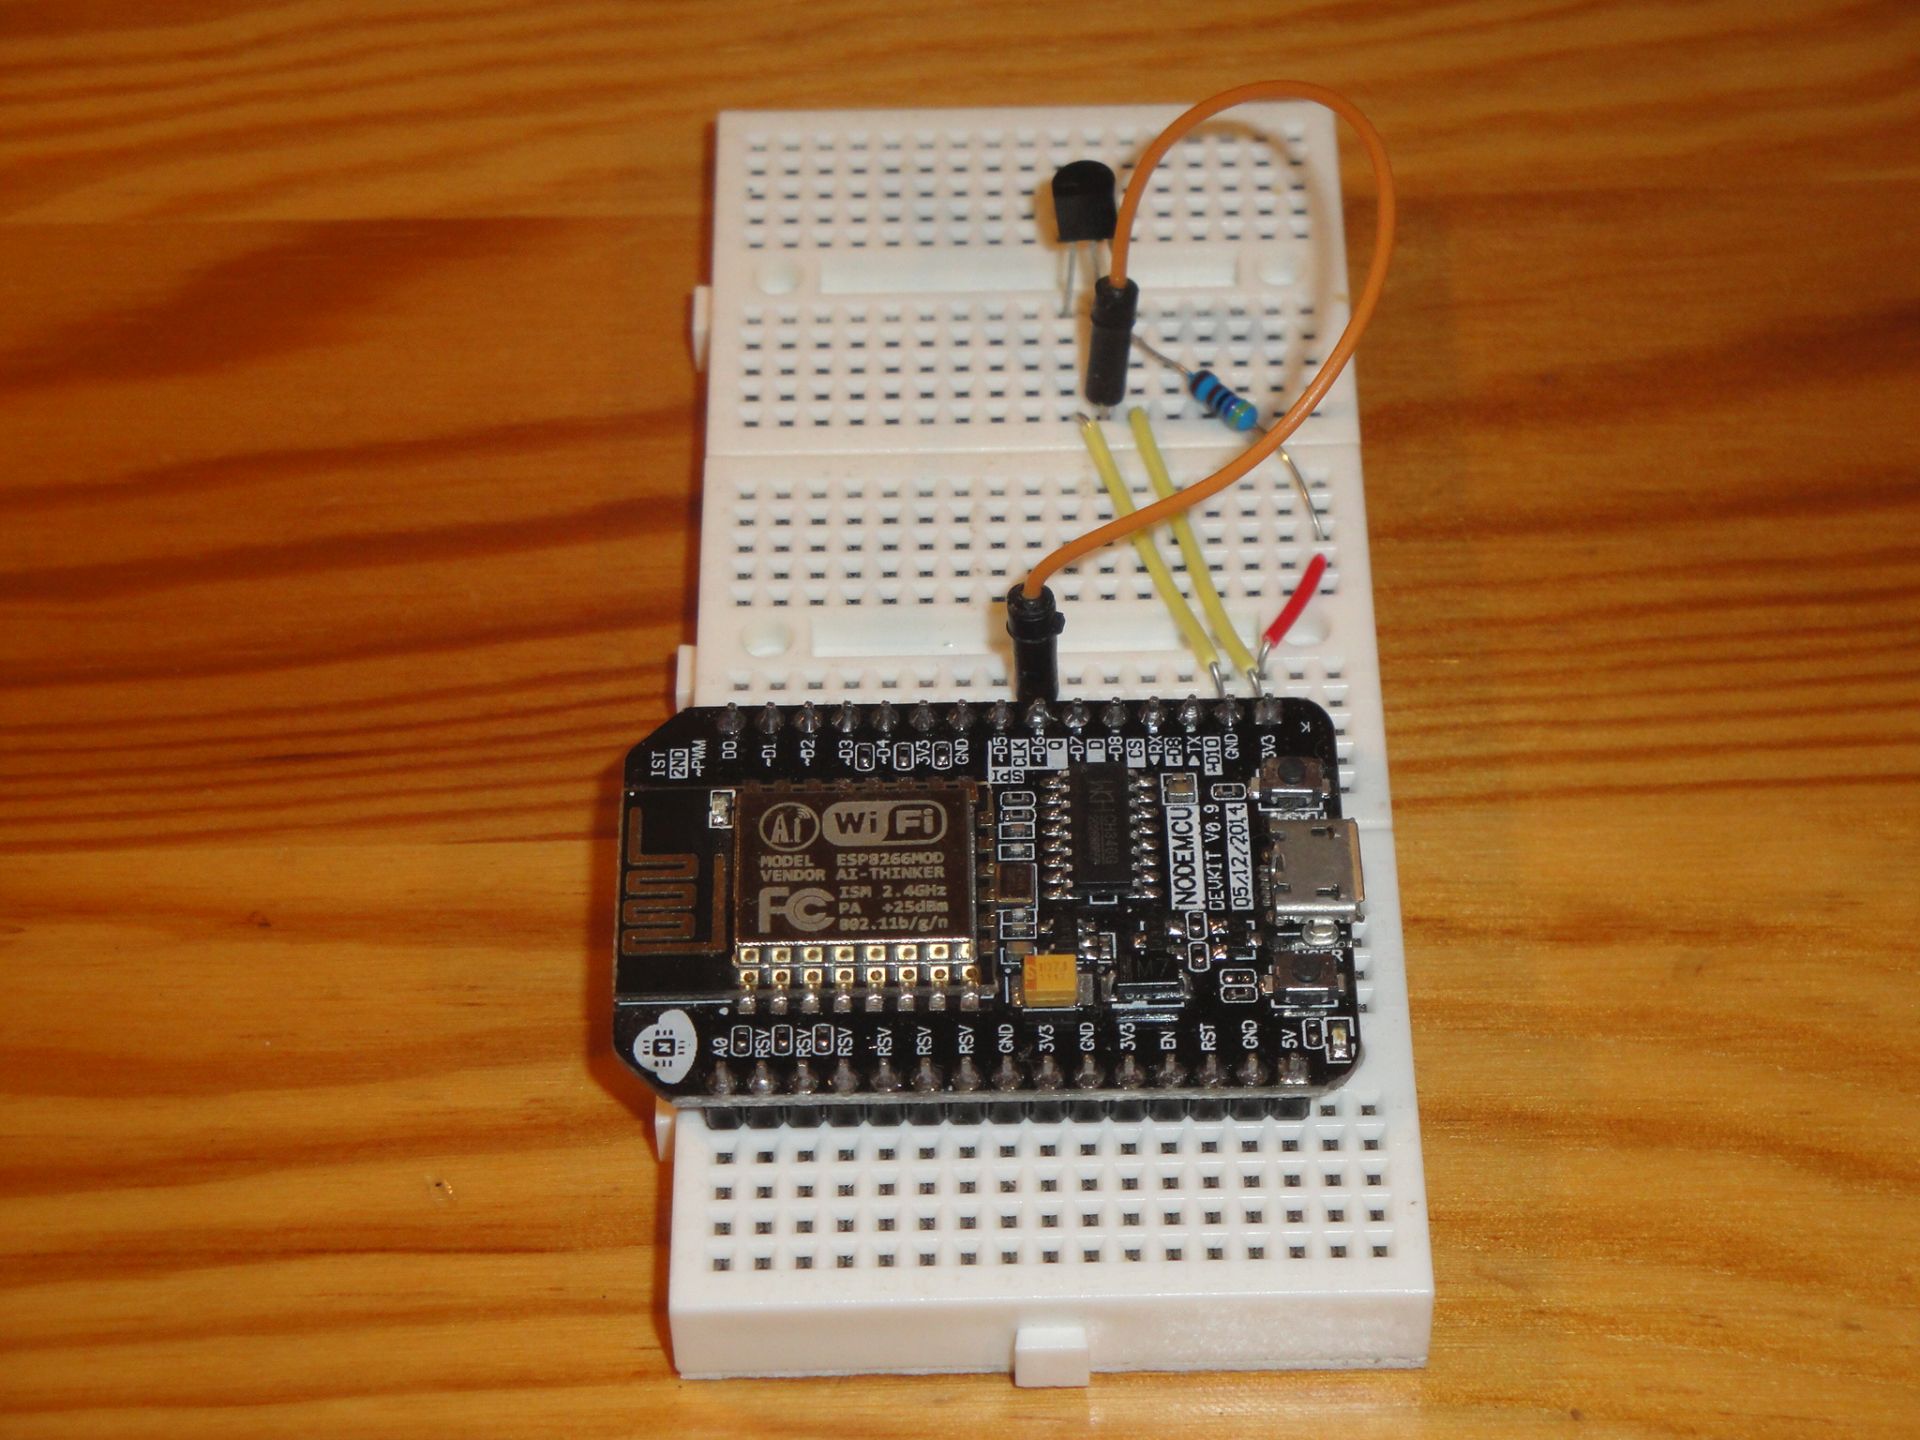
There are many options in the list. I currently only have NodeMCU 0.9, so in the next text I will write about this type of board.
NodeMCU
This board is manufactured in several modifications.
| Generation | Version | Usual name | Link |
|---|---|---|---|
| 1. | 0.9 | v1 | Banggood (Yellow board, but also black CH340 converter boards are available) |
| 2. | 1.0 | v2 | Banggood (converter CH340), Banggood (converter CP2102) |
| 2. | 1.0 | v3 (LoLin) | Banggood (converter CH340) |
In the table are all sizes that can be inserted into the breadboard. Board v1 is a little wider, so it's not easy to plug in the wires and you need to help yourself with wire jumpers under the board.
Additional boards.
Articles
List of articles.
- Connect the NodeMCU to the OLED display
- Inserting the macro definition into the Arduino program
- ESP8266 WiFi scanner
- ESP8266 Conversion of NTP time to the local time
- ESP8266 Saving Passwords Using WiFiManager
- DS1307 and ESP8266 - How does the circuit work at a 3.3 V voltage?
- Get the weather data with ESP8266
- ESP8266 - Writing text strings with an HTML page
- ESP8266 - Thermometer with DS18B20
- ESP8266 - File system SPIFFS
ESP8266 HTTP Server
Simple examples for an HTTP server.
ESP8266 - HTTP server with one page
In this article we will program the HTTP server using the ESP8266 microcontroller. It will be a simple HTTP server that provides one page. In the example, we'll show you how to program this server. We focus on making the source code easy to read. We will ignore most Internet examples that use unclear code or ignore the possibilities of modern C++ compilers.
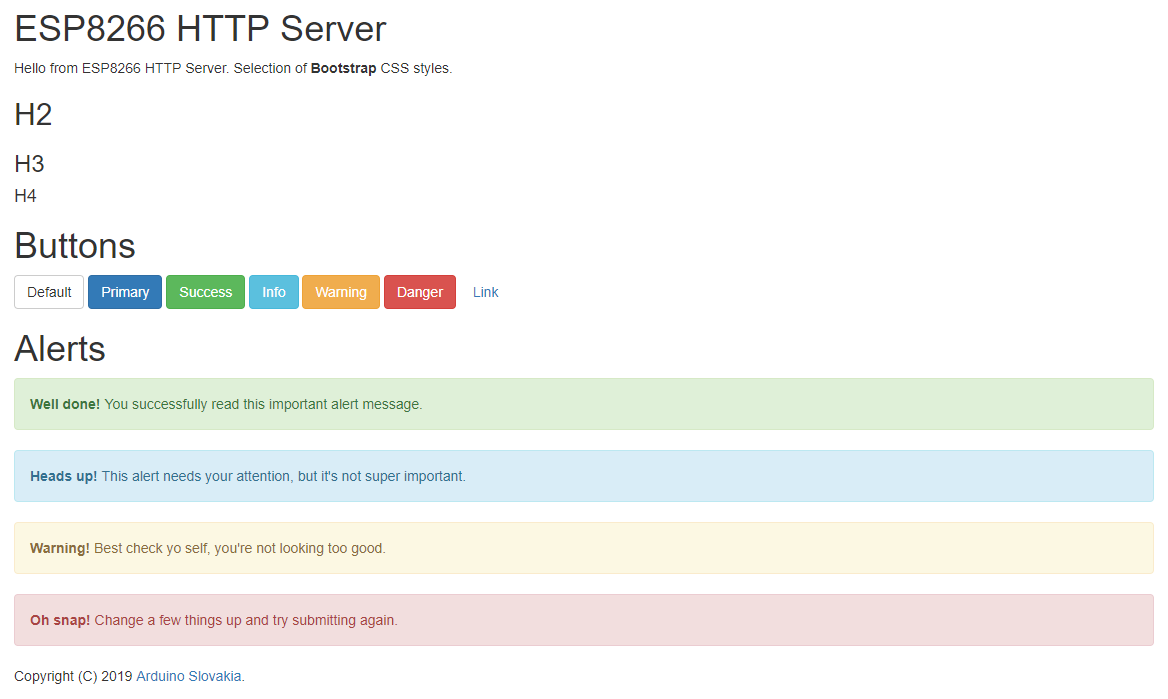 ESP8266 - HTTP server and responsive design
In the previous article, we created an HTTP server with one page. Pages are formatted with HTML tags. Use these tags to design a basic page structure that looks amateurish. The sites that are usually suggested in similar tutorials are also amateurish. If you want the HTML page provided by your ESP8266 to look nice, you need to graphically edit it. But today's time has brought a problem in a number of devices that can display an HTML page. The page can be displayed on your computer, but also on your phone, with each device having a different screen resolution. To be able to view your page on every device in a readable form, you must graphically format the pages to make it possible.
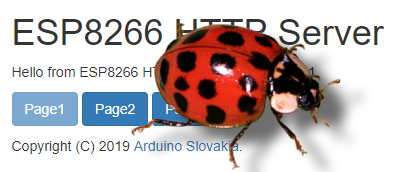
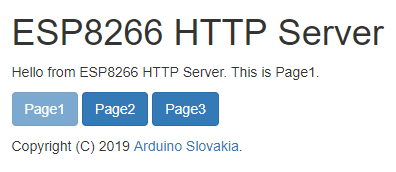 ESP8266 - HTTP server with multiple pages
In this article, we'll build on the articles we learned to create a simple page and give it a nice responsive design. We will now try to create an HTTP server that contains multiple pages. You will be able to switch between pages using hypertext. We will still store the pages in the program's source code, and split them into multiple files for clarity.
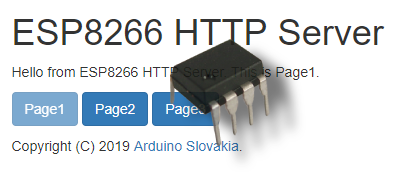 ESP8266 - HTTP server with multiple pages in SPIFFS
In the previous example, we created an HTTP server with three pages. If you look at the source code of the server, you will find the html directory where are the source codes of HTML pages. In this directory I created the design of each page. After designing the pages, I had to copy the source code of each page into c++ source code. Such activity is laborious and inefficient. In this article, we will learn how to omit copying to c++ source code and replace it with the SPIFFS file system.
 ESP8266 - HTTP server, favicon and error handling
In the previous article, we found that our HTTP server cannot handle hypertext that points to a nonexistent page. We've found that the browser will also request favicon.ico for each page. Therefore, today we will learn how to handle errors and how to create a small icon that the browser displays on a bookmark that displays page content.
 ESP8266 - HTTP server and temperature sensor DS18B20
In previous articles we learned how to create HTTP server using microcontroller ESP8266. So far, we've displayed static pages. Gradually, we learned to show pages that were in the source code of the program or were stored in the SPIFFS file system. Today we move a little further. We replace the static page with a dynamic page that displays temperature. Temperature will be measured using the integrated circuit DS18B20.
 ESP8266 - HTTP server and AngularJS
Many of the examples for the ESP8266 use the HTML browser only to display static pages generated by the microcontroller. But this way the Internet worked ten years ago. Today, every browser has a high-performance core that can make static pages dynamic by using javascript. You must be aware that you have a high performance in your browser that is unmatched by the performance of ESP8266 itself.
- ESP8266 - HTTP server and siglepage application with DS18B20
10.01.2020